 KiltPleating101c01.jpg |
 KiltPleating101c02.jpg |
 KiltPleating101c03.jpg |
 KiltPleating101c04.jpg |
 KiltPleating101c05.jpg |
 KiltPleating101c06.jpg |
Here is the photo series, condensed into one table. Click on the image for a full-size picture. Text is below, or, if I have finished it ;-) you can click on the first picture and be walked through the process step-by-step with the full-size pictures. I'll add more alternate methods as I take photos of them.
|
KiltPleating101c01.jpg |
KiltPleating101c02.jpg |
KiltPleating101c03.jpg |
|
KiltPleating101c04.jpg |
KiltPleating101c05.jpg |
KiltPleating101c06.jpg |
Following is step-by-step instructions for making the basic pleat considerably more fancy (See Kilt Pleating 101 B if you don't know the basic pleat used as a precursor to this one).
As I have stated time and time again, there are dozens, if not more, of ways to finish this pleat... this just happens to be the one I use, and thus had the opportunity to shoot a photo series of. Anyone who would like to donate a photo series of another method, by all means email me and I'll add onto the site.
For this finishing variant, you must have either a good-size pennanular (See Photo 3, above, for an example of a pennanular, which is merely a Celtic brooch) or some sturdy leather lacing to hold the top part of the kilt in place on your shoulder. It is also very helpful to have an Ionar, hopefully with reinforcement at the shoulder where you'll be pinning it, to avoid over-stressing your leine if you are using a pennanular.
It is also quite helpful to have a friend help out here... it's really tough to do this without some serious contortions if not.
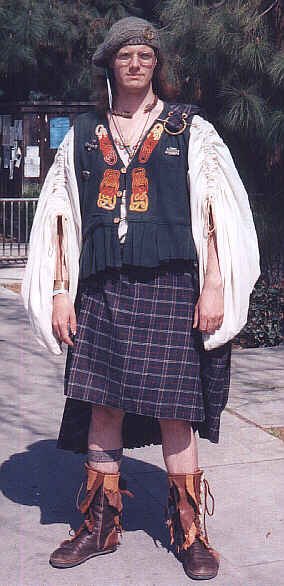
What we are going to do is bring part of the kilt up to the shoulder and pin it in place, which creates a very nice look as the pleats graduate into place as the eye follows the line of the kilt down the fall.
The first thing you'll need to decide, however, is which shoulder you want the kilt attached to. Most right-handed folk prefer to have it on their left shoulder, as this leaves the sword hand free for fighting. This also makes sense in the historical context. There are some out there, however, who feel the need to make a debate out of everything, and insist it matters, per your rank, which side you are "allowed" to pin your kilt. Tell 'em to take a hike. In short: Reverse everything if you hold your sword in the left hand.
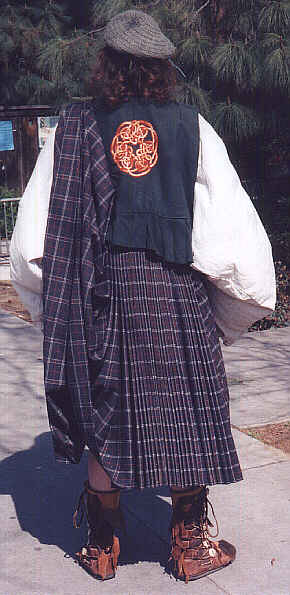
Second thing that matters is whether or not your Ionar (if you have one) has any embroidery or anything else fancy on the back that you don't want to cover up. For example, mine has some fancy celtic knotwork embroidered on it that I certainly wouldn't want to cover. The reason this matters is because if you have something on your back you are showing off, as mentioned above, you will bringing the kilt diagonally across your back, as opposed to straight up, as I have in the pictures.
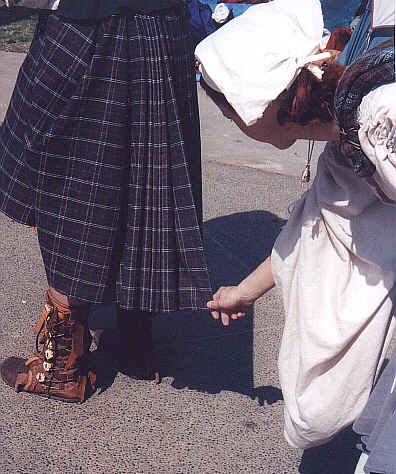
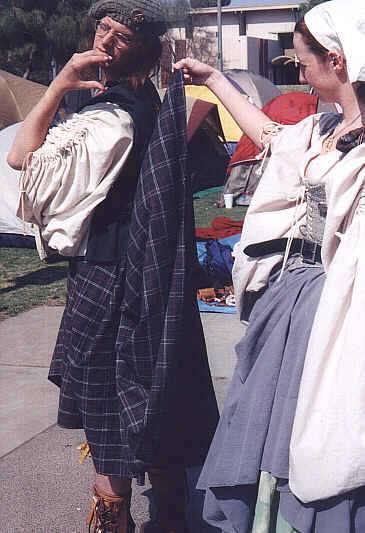
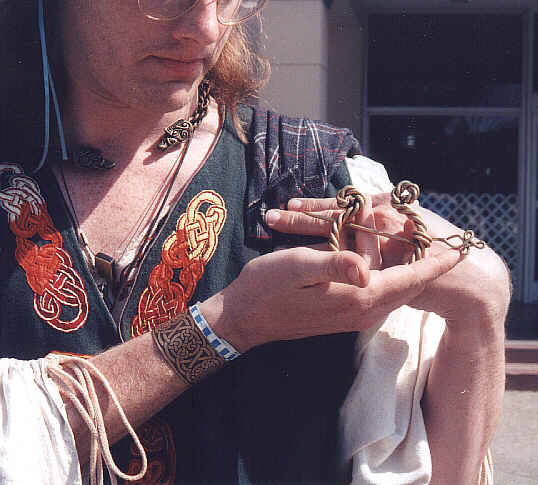
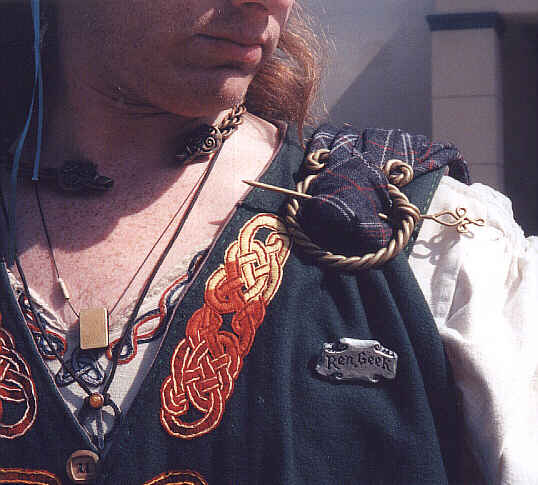
Start off the in finishing position detailed in part 2 of Kilt Pleating 101 B: Part Two, but don't put your belt on yet. Have your friend reach down the LEFT side of the back of your kilt if you are showing off your back, otherwise, they should reach down the right side of the back of your kilt. In Photo 1, above, Lori is reaching down the left side, as I have embroidery I don't wish to cover up. They should reach in approximately 5 inches, or in my case, 5-6 pleats. Look at the photo carefully... you'll get the feel for it after a few tries. So don't do this for the first time on a faire day 5 minutes before you're supposed to be somewhere! In my case, in Photo 2, Lori is lifting the pleat she grabbed straight up to my hand. If I were wearing a plainer Ionar, or no Ionar, another option might be for her to bring it across to the opposite shoulder. I'll try to get a picture of this some time this season. In any event, once you have the kilt in your hand, pin it in place with the pennanular, folding it over as I have if necessary. The Pennanular should always be "cupped up" as it is in my picture. Similar to the horseshoe over the door, an unpside-down pennanular let the luck fall out instead of catching it for you! See Photo 3 and Photo 4 for proper placement. If you do not have a pennanular, you'll need to wrap the leather lacing several times around the kilt and then run a line down to your belt, where you'll tie it off to hold it in place. See Photo 5 and Photo 6 for the finished product. And by the way... remember how I said to make sure your kilt was straight before you belted it on? Photo 5 is a great example of just how bad it can look if it's even one inch off! *grumblegrumbleohsurekalaniit'sperfectlystraightletsjustgetthisoverwithgrumblegrumble* Faire Thee Well!
![]() Back to Kalani's Renaissance Faire Page
Back to Kalani's Renaissance Faire Page
![]() Back to Kalani's Home Page
Back to Kalani's Home Page